
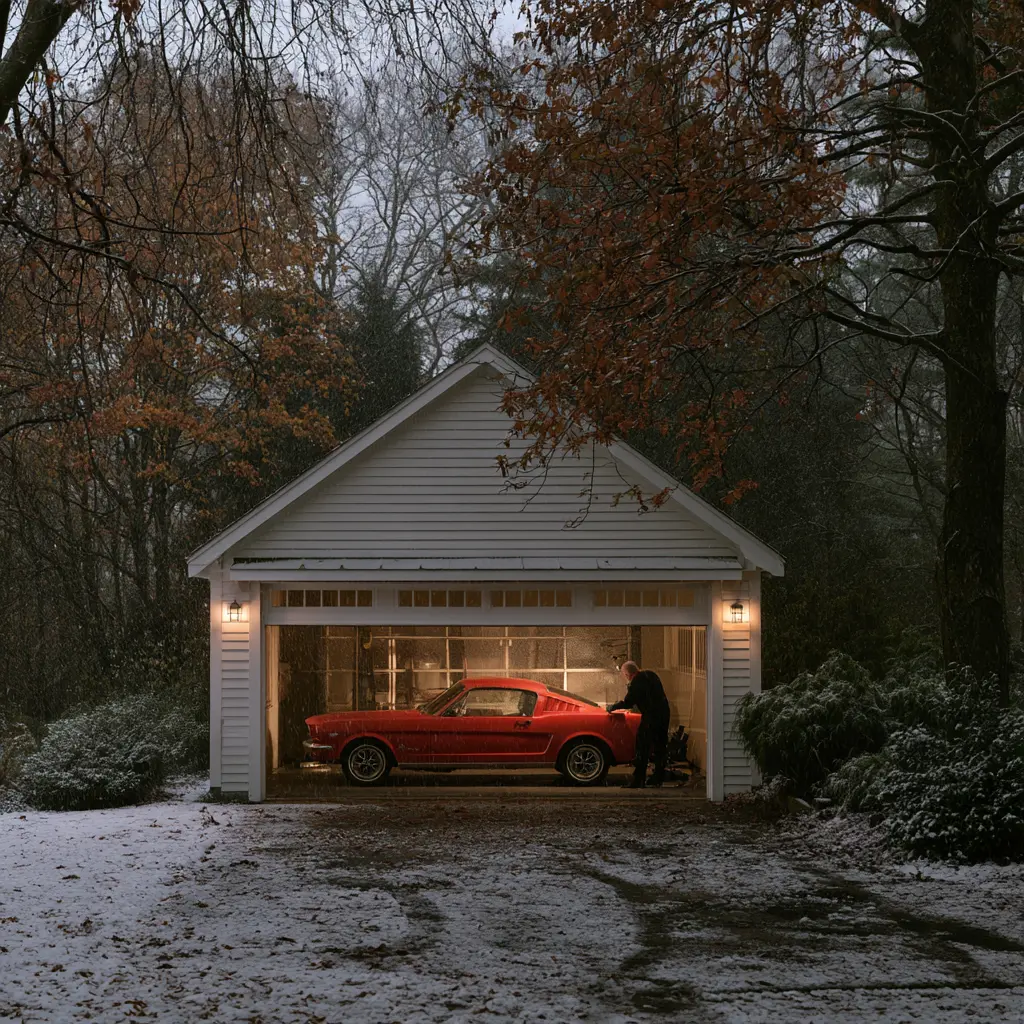
by Muscle Car fanatic, Mike Savage
Every October in New Canaan there’s a Sunday I think of as the last good drive. The maples along the back roads have turned, the air is cool enough that the engine pulls a little harder, and I know that within a few weeks the town trucks will be laying down salt. Once that happens, my cars stay in the garage until spring. What I do in the weeks before that last drive decides whether spring starts with a clean first start or with a dead battery, a sticky carburetor, and a mouse nest in the air cleaner.
I’ve owned muscle cars long enough to have made most of the storage mistakes myself. This guide covers what I’ve learned: what to do, what to skip, and a few old habits that do more harm than good. If you’re newer to the hobby, it also works as a follow-on to my essential maintenance tips for muscle car owners. That post covers keeping a car healthy while you drive it. This one covers keeping it healthy while it sits.
Why Sitting Is Harder on a Car Than Driving
A car that’s being driven keeps itself healthy. Oil coats the bearings and cylinder walls, seals stay flexible, the battery gets recharged, and the tires stay round. When a car sits for five or six months, all of that stops. Fuel goes stale, moisture condenses in cold metal, rubber dries out, and small animals move into a quiet, sheltered spot that nobody checks.
Hagerty, the classic car insurer, starts its own storage advice from the same idea: cars don’t like to sit. Their step-by-step classic car winterization and storage guide is one of the most practical references I know, and I’ve borrowed from it for years. The goal is not to stop time. It’s to slow the damage down enough that spring means a short checklist instead of a repair bill.
Step One: Pick the Right Place
Where the car spends the winter matters more than any product you buy. My rule is simple: dry beats everything. A spotless garage with a damp slab and poor airflow will do more harm than a plain, dry outbuilding.
Here’s what I look for:
- An enclosed, dry space. A carport or a tarp in the driveway isn’t storage. Snow, freeze-thaw cycles, and trapped moisture will find their way in.
- Stable temperatures. A space that doesn’t need heat is fine, but big daily temperature swings cause condensation. Insulated walls help a lot.
- Access to power. Not required, but a nearby outlet makes a battery maintainer easy.
- Security and insurance. If the car is going to an off-site facility, check the security and make sure your policy covers the car there. After years of running a business, I read the fine print on storage agreements closely.
If you don’t have room at home, many towns have a car club or garage crew that shares storage space or knows who has it. A good local crew is worth building for plenty of reasons, and October is when those connections pay off.
Step Two: Clean It Like You Mean It
Don’t put a dirty car away for the winter. Road grime holds moisture against the paint and chassis, bird droppings and tree sap etch the finish, and crumbs in the interior draw rodents from across the property.
Before storage I do the following:
- Wash the car thoroughly, including the underside and wheel wells, where road salt and grime collect.
- Let it dry completely, then apply a good coat of wax.
- Vacuum the interior and take out everything that isn’t part of the car: wrappers, napkins, gum, and anything with a scent.
- Treat rubber seals, vinyl, and leather with a proper protectant so they don’t dry out and crack.
Hagerty also suggests putting an open box of baking soda in the cabin to absorb moisture and odors. It costs almost nothing and it works.
Step Three: Fuel — The Biggest Spring Headache
If there’s one thing I’d tell every new muscle car owner about storage, it’s this: take the fuel seriously. Modern pump gas is not the fuel these engines were built for, and it doesn’t age well. I covered octane and ethanol in detail in Fueling the Beast: choosing the right gas for your muscle car, and those same issues get worse when fuel sits for months.
My routine:
- Fill the tank nearly full. A full tank leaves less air space, so less moisture can condense inside the tank over the winter.
- Use ethanol-free gas if you can find it. Hagerty recommends it for storage, and so do I. Ethanol blends take on moisture and break down faster, and the older rubber in many classic fuel systems doesn’t handle ethanol well.
- Add a quality fuel stabilizer. Mix it in at the pump so it blends as the tank fills.
- Run the engine so the treated fuel reaches the carburetor and lines. Stabilizer only helps where it has actually traveled.
Keep in mind that stabilizer is a preventive, not a cure. It slows fuel from breaking down, but it won’t fix fuel that’s already gone bad or remove water that’s already in the tank. Start with fresh fuel.
Step Four: Oil and Fluids
Used motor oil contains acids and contaminants from combustion, and letting them sit against engine internals all winter isn’t a good idea. I change the oil and filter before storage rather than in spring. That way the engine spends the winter in clean oil, and Hagerty specifically suggests a rust-preventive formula for stored cars.
While I’m at it, I check:
- Check both the level and the freeze protection. A cracked block from a cold snap is an expensive way to learn this lesson.
- Brake fluid. It absorbs moisture over time. If it’s dark or more than a couple of years old, change it now rather than after it has sat all winter.
- Transmission and differential fluid. Top them off and look for leaks. A drip is much easier to spot on a clean floor in October than after months of dust have built up.
Then comes a step many people skip: after the fluid work and the fuel run, drive the car long enough to reach full operating temperature. Hagerty’s storage mythbusting suggests at least 15 minutes so the moisture that builds up in the exhaust and crankcase burns off. A short run up and down the driveway leaves that moisture in place.
Step Five: Battery — Maintain, Don’t Just Disconnect
Batteries are the most common cause of spring trouble, and most of that trouble is avoidable. A lead-acid battery that slowly drains over the winter can sulfate and never fully recover.
You have two options:
- Disconnect the negative terminal. This works for shorter layups, but even a disconnected battery loses charge over a long winter.
- Use a smart battery maintainer. This is my choice for anything longer than a month. A good multi-stage maintainer charges when the voltage drops and then switches to float mode, so it won’t overcharge the battery.
You may have heard that a battery sitting on a concrete floor will drain itself. Hagerty addresses this directly: modern batteries have sealed, insulated plastic cases, and the concrete floor is not the problem. Even so, a clean, dry battery top is worth keeping, since dirt and moisture on the case can create a slow drain.
Step Six: Tires and Suspension
Tires that sit under a car’s weight for months can develop flat spots. With the bias-ply and period-correct tires many of us run, those flat spots can take a long time to go away, or they may never fully recover.
- Inflate to the upper end of the recommended range. Cold air lowers tire pressure, so a few extra PSI helps offset that drop.
- For long storage, consider jack stands. Hagerty says stands generally aren’t needed unless the car will sit for six months or more. If you use them, place them on the frame or suspension points your car is designed for.
- Or roll the car a few feet once a month. This changes the contact patch and is an easy job during a monthly garage check.
- Leave the parking brake off. Brake shoes can stick to the drums over a damp winter. Use wheel chocks.
Step Seven: Keep the Critters Out
This is the step that matters most in Connecticut. A stored car gives mice a warm, dry, sheltered place to nest, and they chew wiring, fill air cleaners with nesting material, and ruin upholstery in a single season. I’ve seen a restored car’s interior harness chewed badly enough to need replacing.
My defense has several layers:
- Block the openings. Put a plug or screen in the tailpipe and over the air intake. Hagerty recommends this, and I also put a bright tag on the steering wheel to remind myself to remove them before starting the car.
- Remove anything they’d eat. That includes crumbs in the cabin and birdseed or pet food stored in the garage.
- Add deterrents and traps around the car. Peppermint oil, dryer sheets, and traps placed around the perimeter are all common. I use traps outside the car rather than poison inside it, because a rodent that dies inside a door panel creates a problem of its own.
- Check monthly. Look for droppings on the floor, the tires, and under the hood.
If you do find signs of rodents, clean them up carefully. The Centers for Disease Control and Prevention publishes guidance on how to clean up after rodents because droppings and urine can carry hantavirus. The CDC advises airing out the space before cleaning, wearing gloves, and wetting droppings with a disinfectant before wiping them up. They specifically warn against sweeping or vacuuming droppings, which can put virus particles in the air. For vehicles, the CDC also recommends opening the hood and airing out the engine compartment before starting the car. When the cleanup is inside a car, I choose a disinfectant that’s safe for the specific interior material, since straight bleach solutions can damage leather and some vinyls.
Step Eight: Cover It Properly
A car cover is required unless your storage space has serious air filtration. Every barn-find car you’ve seen covered in grime would have come out in far better shape if someone had put a cover on it decades ago.
Choose a breathable indoor cover, not a plastic tarp. Plastic traps moisture against the paint, which causes exactly the damage you’re trying to prevent. The cover should fit well, have a soft inner lining, and go on only after the car is completely clean and dry. Close the windows and make sure every interior and trunk light is off.
The Myth I Wish Would Die: “Start It Every Few Weeks”
Plenty of well-meaning owners walk out to the garage every couple of weeks, start the car, let it idle for five minutes, and shut it off. It seems helpful, but it usually isn’t.
A short idle never gets the engine or exhaust fully warm. The combustion creates moisture that condenses in the exhaust and crankcase and never burns off. The battery also loses more energy to cranking than a few minutes of idling puts back. Hagerty’s guide says plainly that these partial warm-up cycles may do more harm than good. Once the car is put away, leave it alone unless you can take it on a real drive on clean, dry roads.
Waking It Up in Spring
When the streets have been rinsed by a few good rains and the salt is gone, here’s my recommissioning routine:
- Remove the tailpipe and intake plugs first, and take the reminder tag off the steering wheel.
- Look for rodent activity, fluid leaks, and anything that changed over the winter.
- Check tire pressures and set them back to the normal driving spec.
- Check the battery. If it was disconnected instead of on a maintainer, give it a full charge before reconnecting.
- Check all fluid levels again.
- Start the car and let it reach full operating temperature (Hagerty suggests at least ten minutes) before driving.
- Test the brakes gently at low speed before your first real drive. Drums and rotors can pick up surface rust over the winter.
If spring turns up something bigger, like a leaking seal or brittle hoses, use it as a chance to plan the next project. My complete guide to first-time muscle car restoration projects covers how to scope that work without getting in over your head.
Storage Is Part of Protecting an Asset
I see this through the lens of my day job. As CEO of 1-800Accountant, I spend a lot of time with small business owners who know that protecting an asset costs far less than replacing one. A well-kept classic holds its value. I wrote about that in muscle cars as alternative investments, and condition is one of the biggest factors in what a car is worth. A careful winter storage routine is inexpensive and a big part of protecting that value.
The same instinct runs through everything I collect. The care that goes into climate and storage for the pieces on my collections site is the same care I put into the garage each fall. At home, October is also when I get my koi ponds ready for the cold, which I write about on my main site. And when the cars are tucked away and the ponds are settled, winter is when my wife Sandra and I focus on the families we serve through the Savage-Rivera Foundation, and sometimes plan the warm-weather trips that end up on my travel blog.
Your October Storage Checklist
- Choose a dry, enclosed, secure storage space
- Wash, wax, and fully dry the car, and clean out the interior
- Fill the tank with ethanol-free fuel if possible, add stabilizer, and run it through the system
- Change the oil and filter, and check coolant, brake fluid, and other fluids
- Drive the car to full operating temperature one last time
- Connect a smart battery maintainer
- Inflate tires to the upper end of the range, and use stands or roll the car monthly for long storage
- Leave the parking brake off and use wheel chocks
- Plug the tailpipe and intake, and hang a reminder tag on the steering wheel
- Set rodent traps and deterrents around the car
- Put on a breathable, well-fitting indoor cover
- Resist the urge to idle it every few weeks
If you’d like to see what’s in my garage this season, including the last-drive photos I take every fall, follow along on Instagram. Put your car away carefully this October, and it’ll be ready to drive in spring.
Mike Savage of New Canaan, CEO of 1-800Accountant, founder of Savage-Rivera Foundation, is a lifelong muscle car enthusiast, collector, and entrepreneur. He shares his passion for classic American performance at mikesavagenewcanaan.com.